Documentation
Learn how to create and customize your blog on SimpleBlog.
Writing Posts
Posts are the main content of your blog. They appear in your blog's feed, sorted by publish date.
Creating a new post
From your dashboard, click the New Post button. You'll see the post editor with the following options:
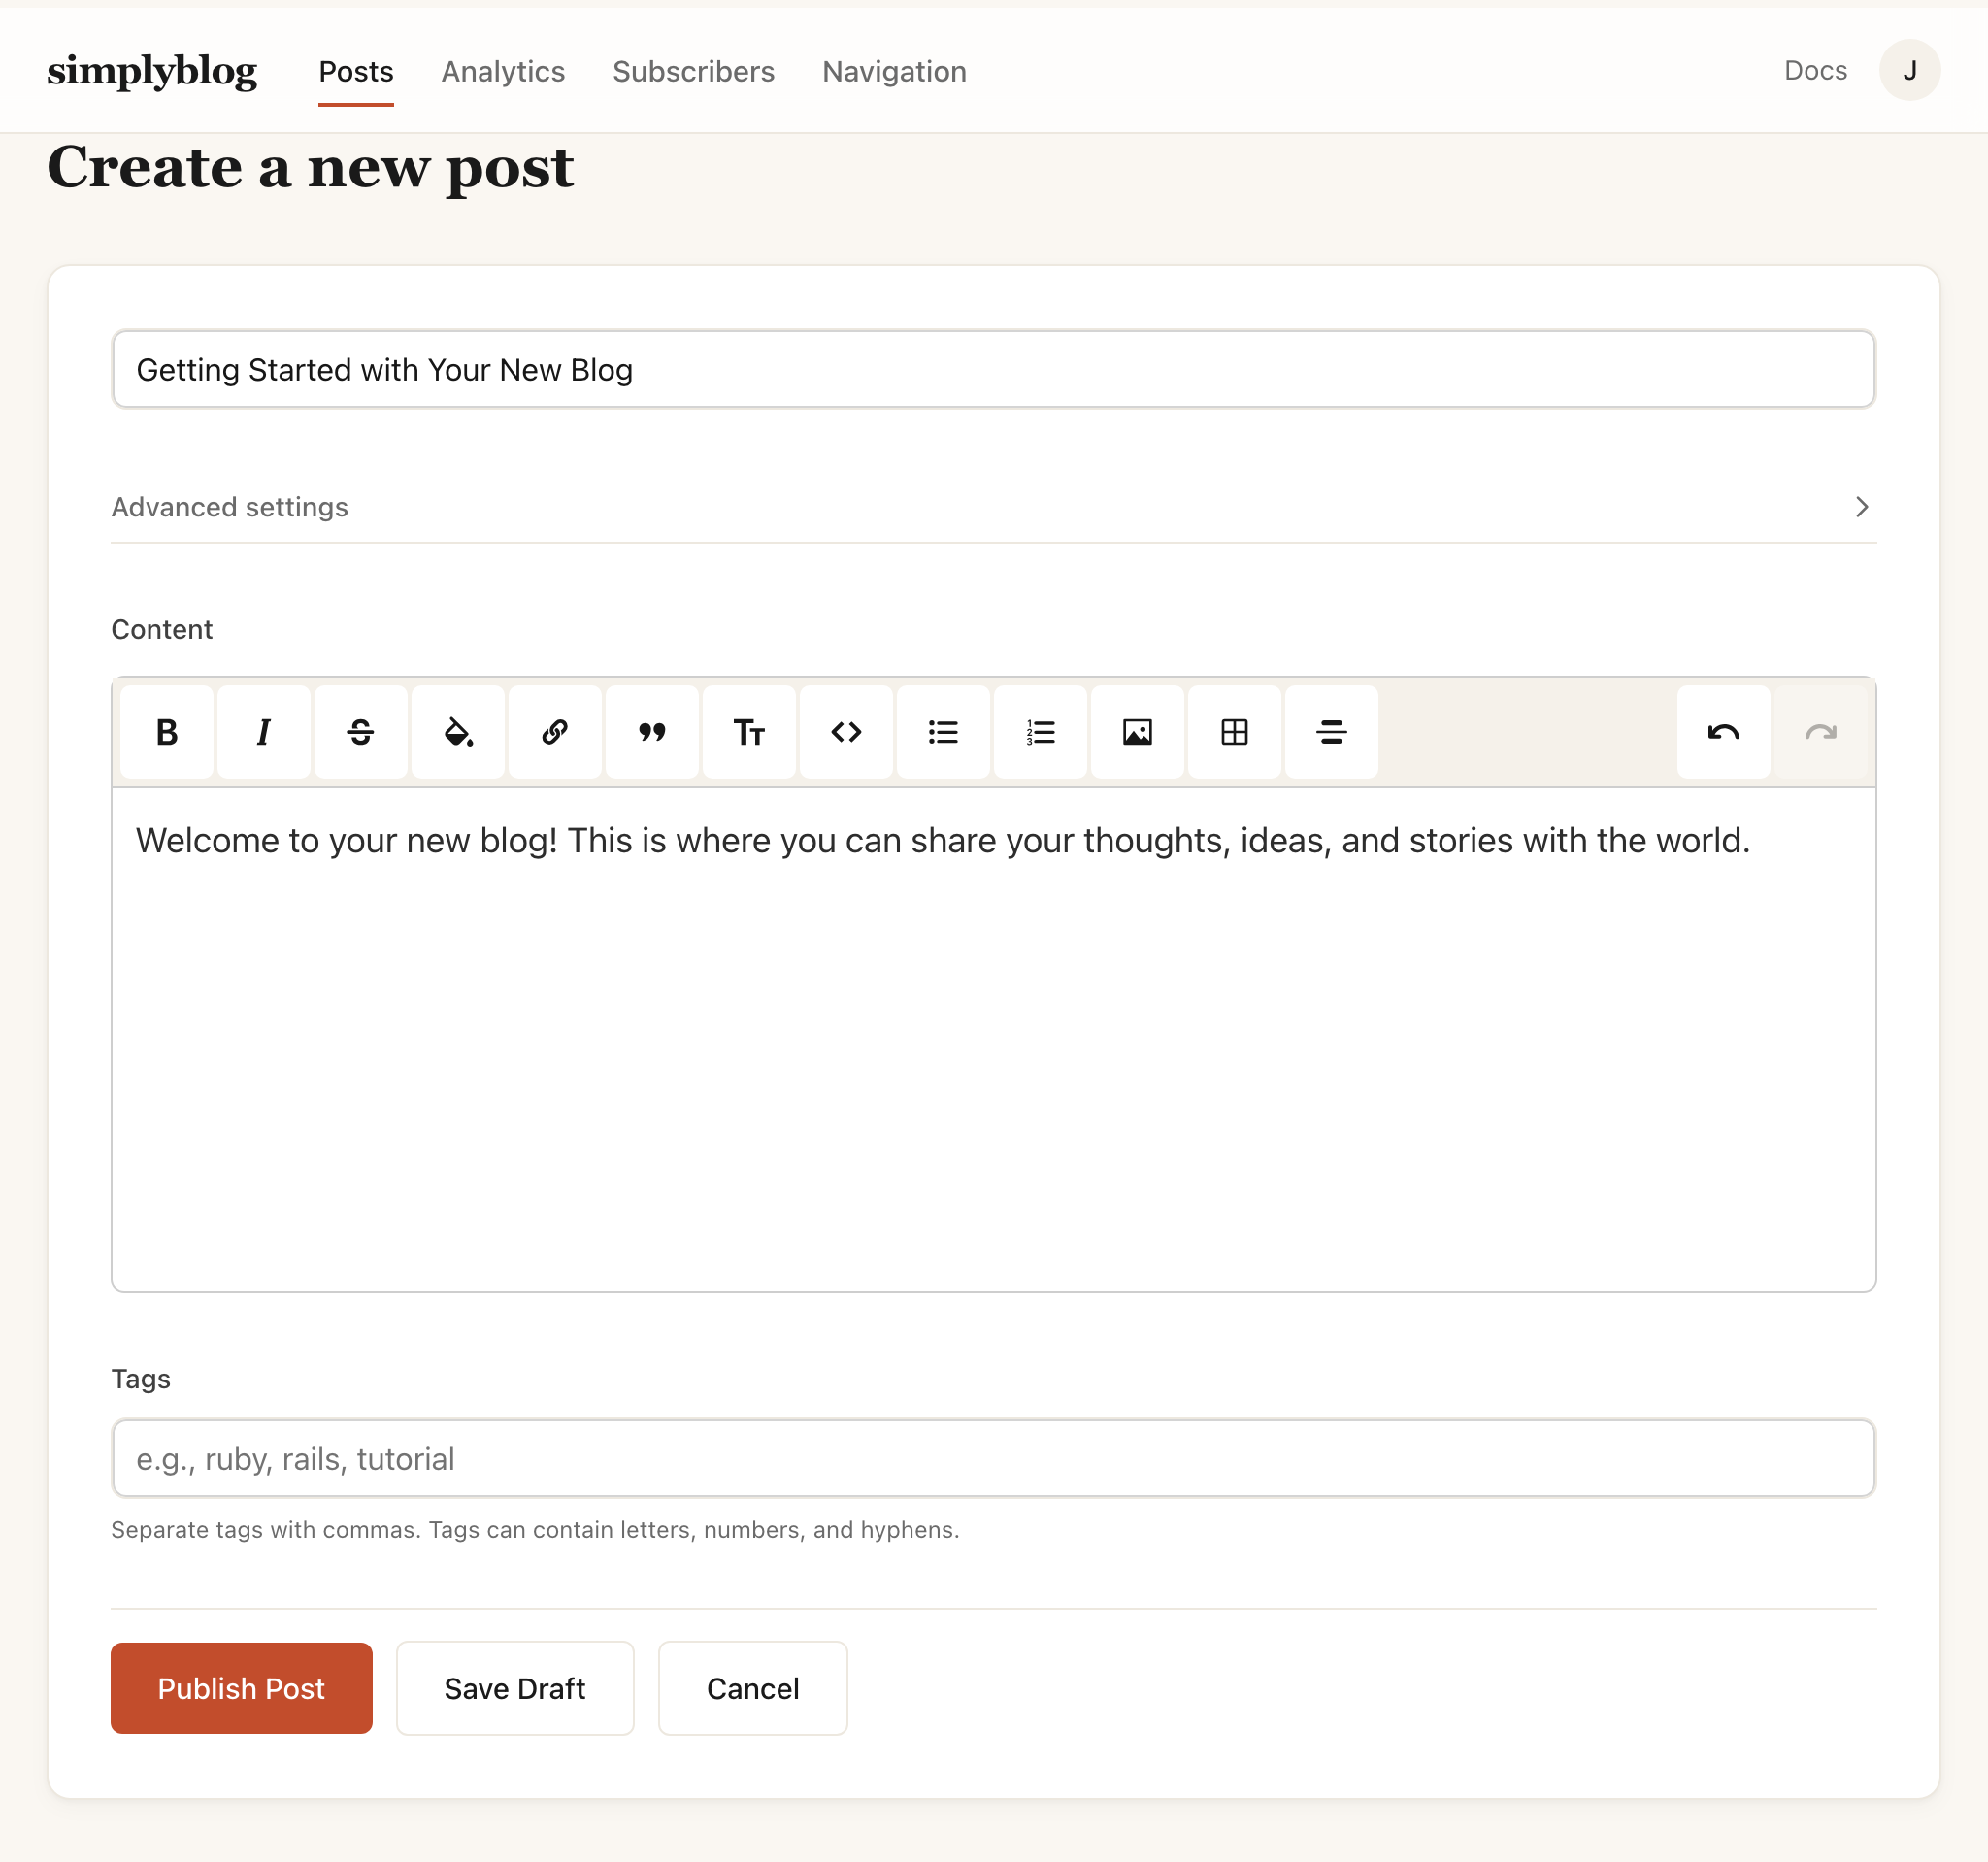
- Title — The headline of your post. This appears at the top of the post and in your blog's post list.
- Content — Write using the rich text editor. You can format text, add links, images, and more.
- Publish date — Set when the post should be published. Schedule future posts or backdate to any time.
- Tags — Add comma-separated tags to categorize your post. Tags help readers find related content.
- Featured image — Upload an image to display at the top of your post and in social previews.
- Slug — The URL path for your post. Auto-generated from the title, but you can customize it.
Publishing
Posts can be saved as drafts or published immediately. Draft posts are only visible to you. When you're ready, change the status to Published and your post will go live.
Creating Pages
Pages are standalone content that doesn't appear in your blog's post feed. Use pages for static content like About, Contact, or custom landing pages.
Creating a new page
From your dashboard, go to the Pages tab and click New Page. Pages have the same editor as posts, with a few differences:
- No publish date — Pages are either published or draft, without date-based scheduling.
- Hide title — Option to hide the title on the page itself (useful for custom homepage designs).
- No tags — Pages aren't categorized like posts.
Use cases
- About page — Tell visitors about yourself or your blog.
- Contact page — Provide ways for readers to reach you.
- Custom homepage — Design a unique landing page and set it as your blog's homepage in settings.
GitHub Sync
Sync your blog posts directly from a GitHub repository. Write your posts in Markdown, push to GitHub, and SimpleBlog automatically updates your blog.
Connecting your repository
From your dashboard, go to Settings → GitHub to set up the connection:
- Repository — Enter in
owner/repoformat (e.g.,johndoe/my-blog-posts). - Folder path — The folder containing your Markdown files. Defaults to
posts/. - Personal Access Token — Create a Personal Access Token with repo scope.
Markdown file format
Each Markdown file should include YAML frontmatter at the top. The title field is required:
---
title: My Blog Post Title
published_at: 2024-01-15
tags: [tutorials, getting-started]
draft: false
---

Your post content goes here in Markdown format.
Frontmatter options
- title (required) — The headline of your post.
- published_at — The publish date. Accepts dates like
2024-01-15or2024-01-15 10:30:00. - tags — A list of tags for categorization. Use YAML list syntax:
[tag1, tag2]or separate lines. - draft — Set to
trueto save as a draft, orfalseto publish.
How syncing works
- The filename becomes the post's URL slug (e.g.,
my-first-post.md→/my-first-post). - Images in your Markdown are automatically downloaded and hosted on SimpleBlog.
- Updating a file updates the existing post—posts are tracked by filename.
- Files larger than 1MB are skipped.
Automatic updates
When you push changes to your repository, SimpleBlog receives a webhook notification and syncs the updated files automatically. You can view recent sync activity and any errors from the GitHub settings page.
Special Variables
SimpleBlog supports special variables that you can use in your post or page content to embed dynamic content.
The posts variable
Use {{ posts }} to embed a list of your blog posts anywhere in your content. This is useful for creating custom category pages, featured posts sections, or related posts lists.
Options
tag— Filter posts by a specific tag.limit— Limit the number of posts displayed.exclude_current— Exclude the current post from the list (useful for "related posts" sections).
Examples
Display all published posts.
Display the 3 most recent posts.
Display all posts tagged "tutorials".
Display up to 5 posts tagged "featured", excluding the current post.
Customization
SimpleBlog gives you full control over how your blog looks and feels. Access customization options from the Theme and Settings pages in your dashboard.
Theme settings
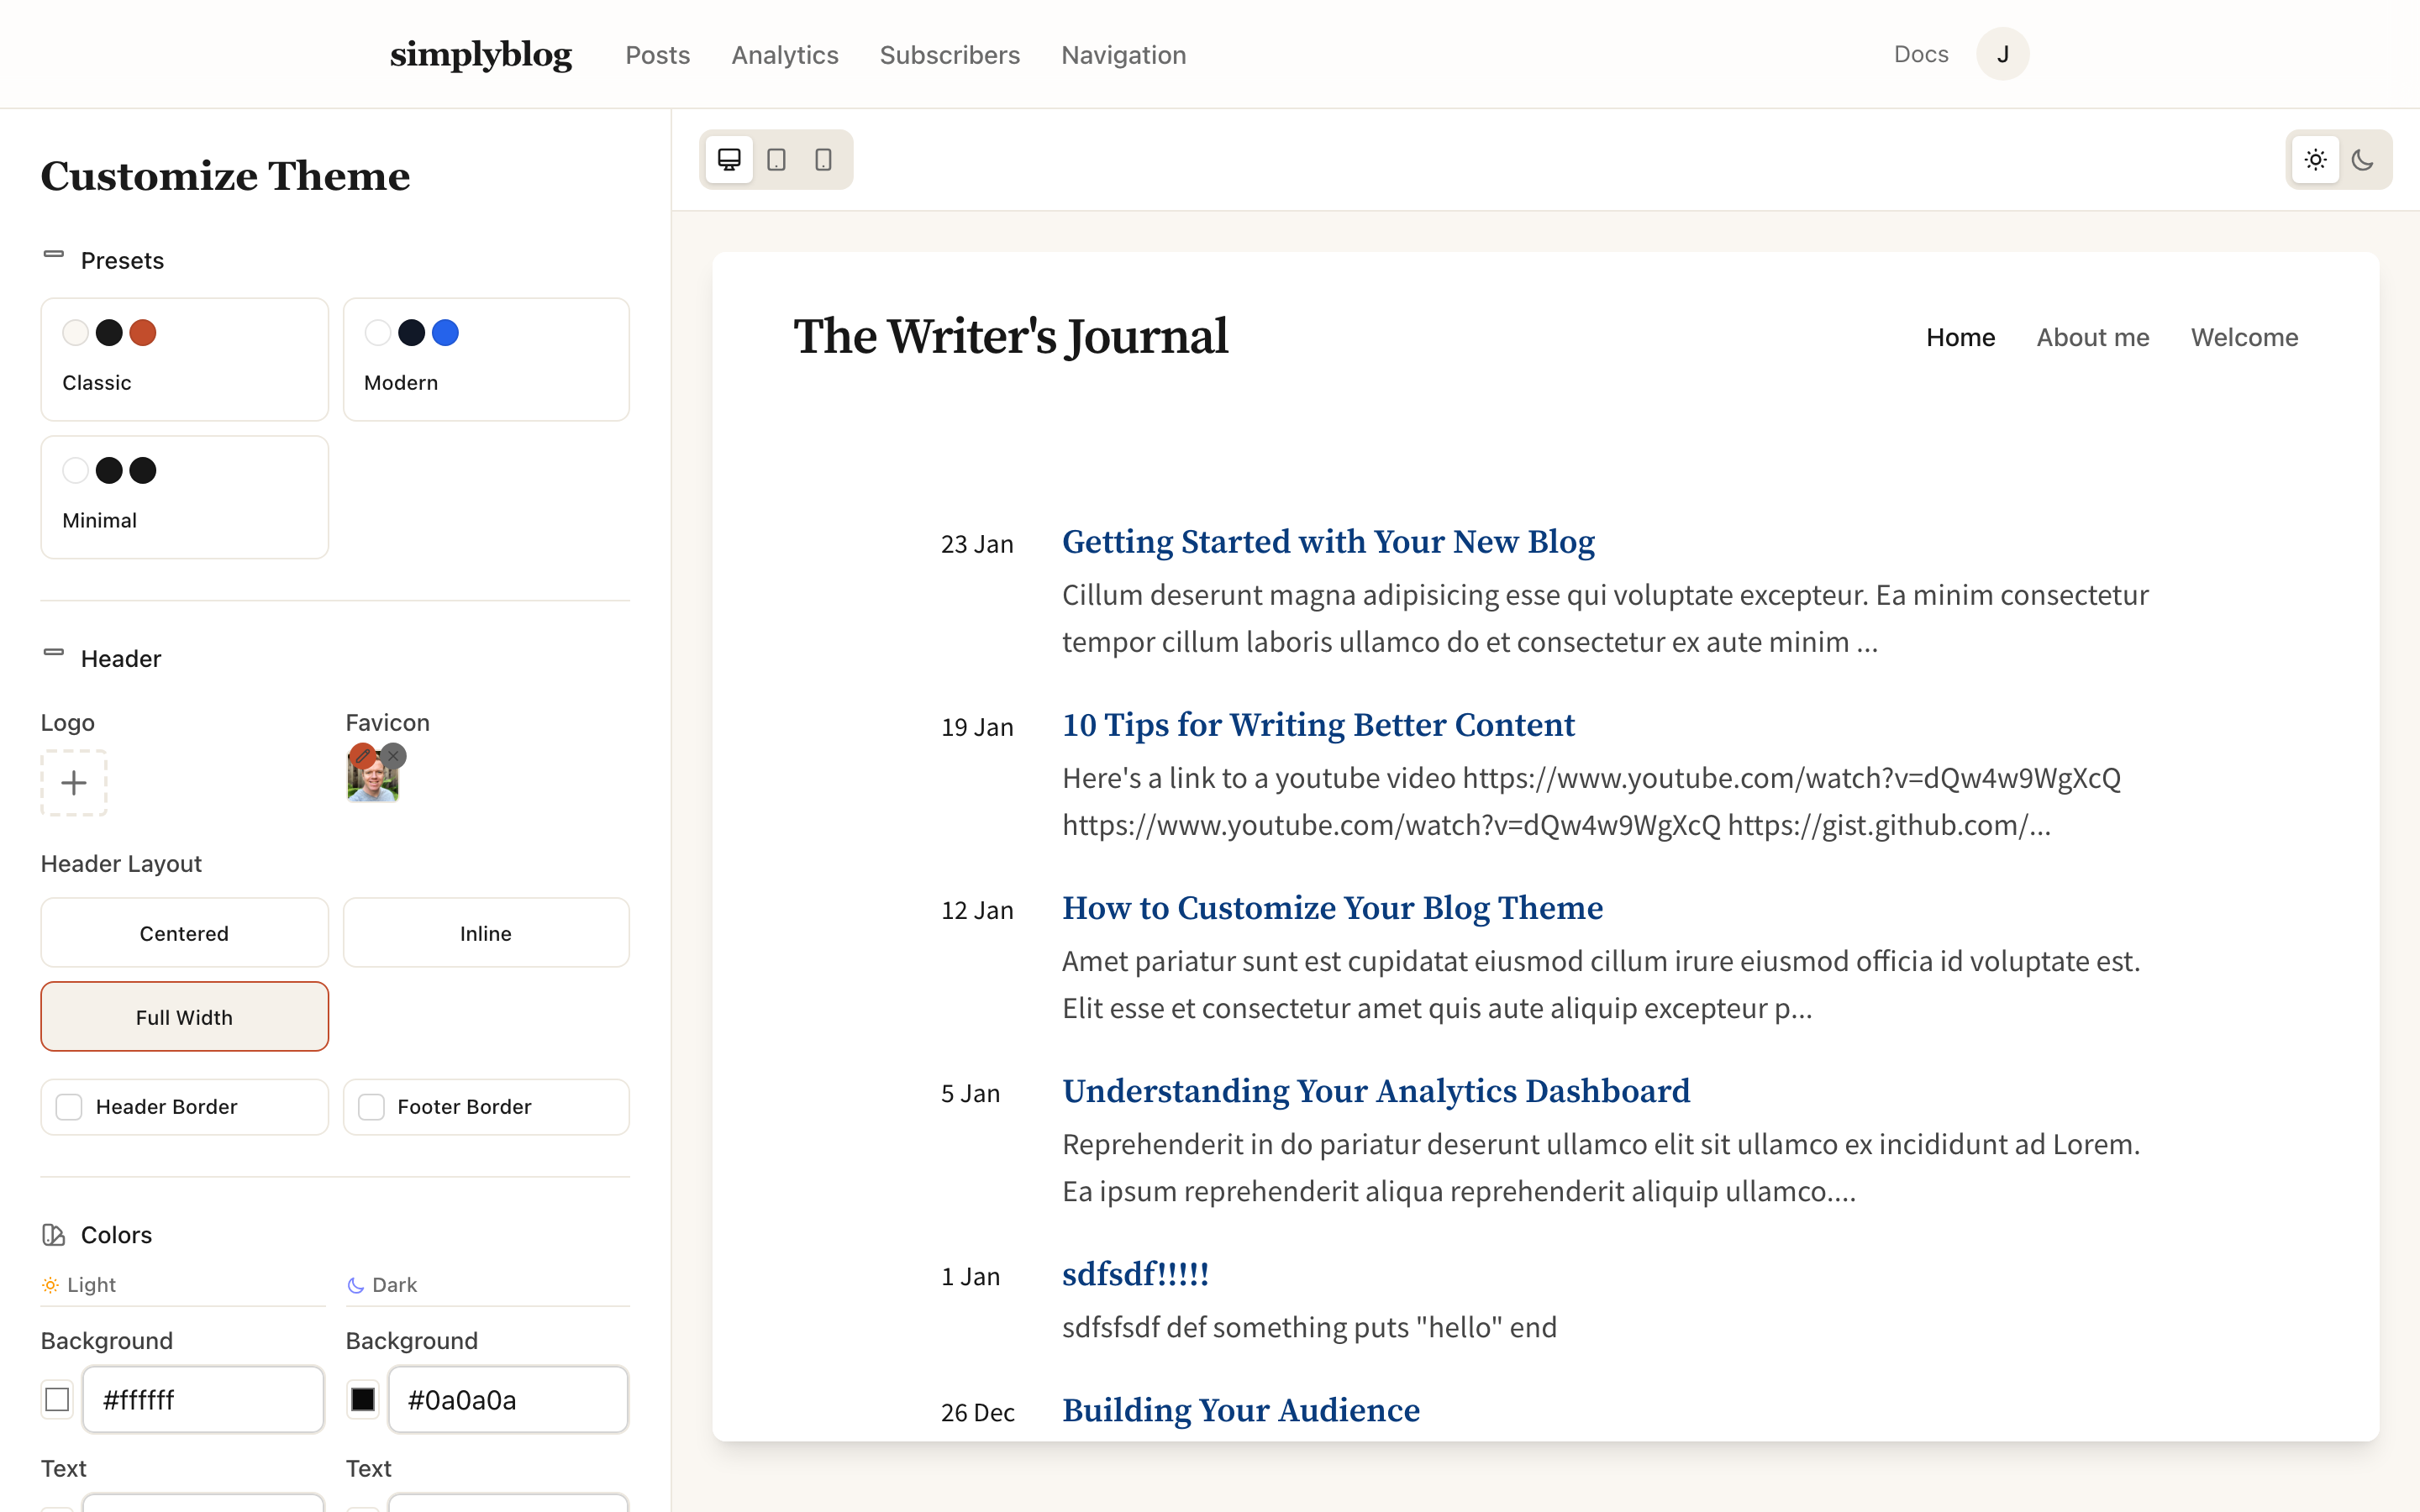
- Colors — Customize background, text, accent, and link colors for both light and dark modes.
- Presets — Start with a pre-built theme (Classic, Modern, or Minimal) and customize from there.
- Header & footer — Set separate background colors and border visibility.
Typography
- Heading font — Choose from options like Cormorant Garamond, Playfair Display, Lora, and more.
- Body font — Select a font for your post content: Instrument Sans, Inter, Source Sans Pro, etc.
- Font scale — Adjust overall text size: Small, Medium, or Large.
- Code theme — Pick a syntax highlighting theme for code blocks.
Layout
- Content width — Narrow (640px), Medium (768px), or Wide (896px).
- Post title alignment — Left or centered.
- Header layout — Centered, inline, or full-width.
- List style — Display posts as Standard list, Cards, or Timeline.
- Border radius — Control rounded corners throughout your blog.
Navigation
Customize header and footer links from the Navigation page:
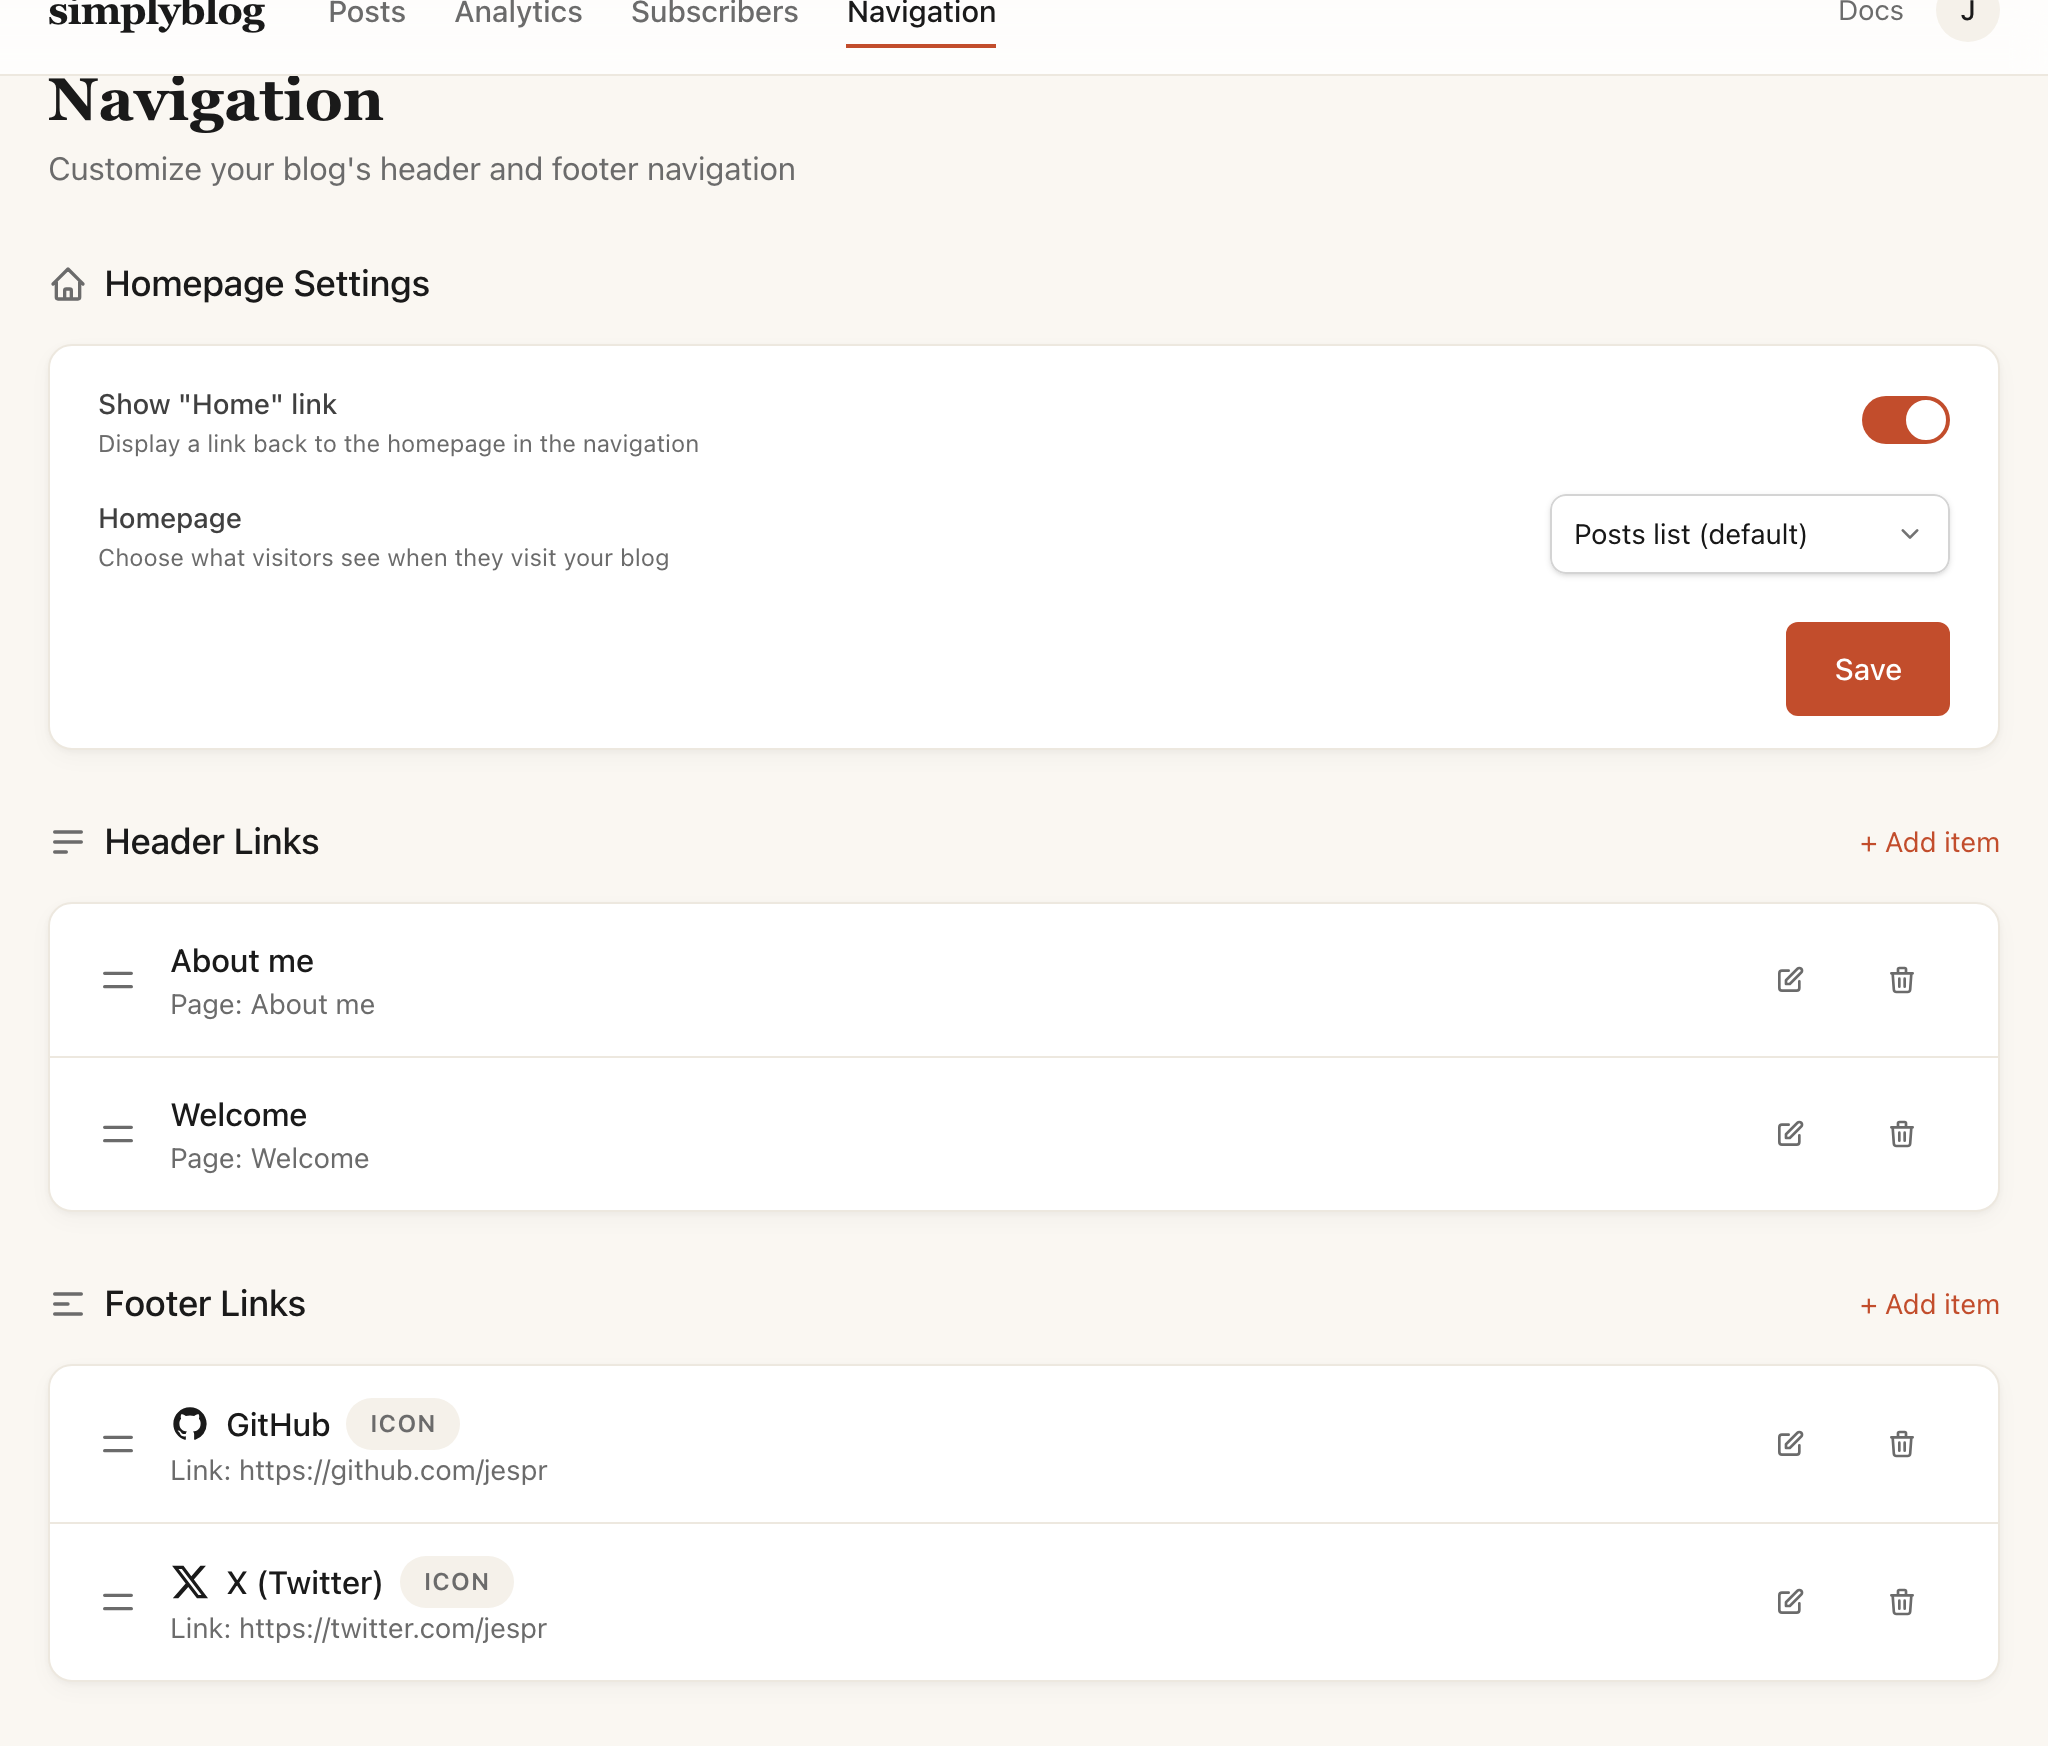
- Add links to pages, posts, or external URLs.
- Include social media icons (X, Bluesky, Instagram, GitHub, and more).
- Reorder items via drag-and-drop.
- Show or hide individual links.
Blog settings
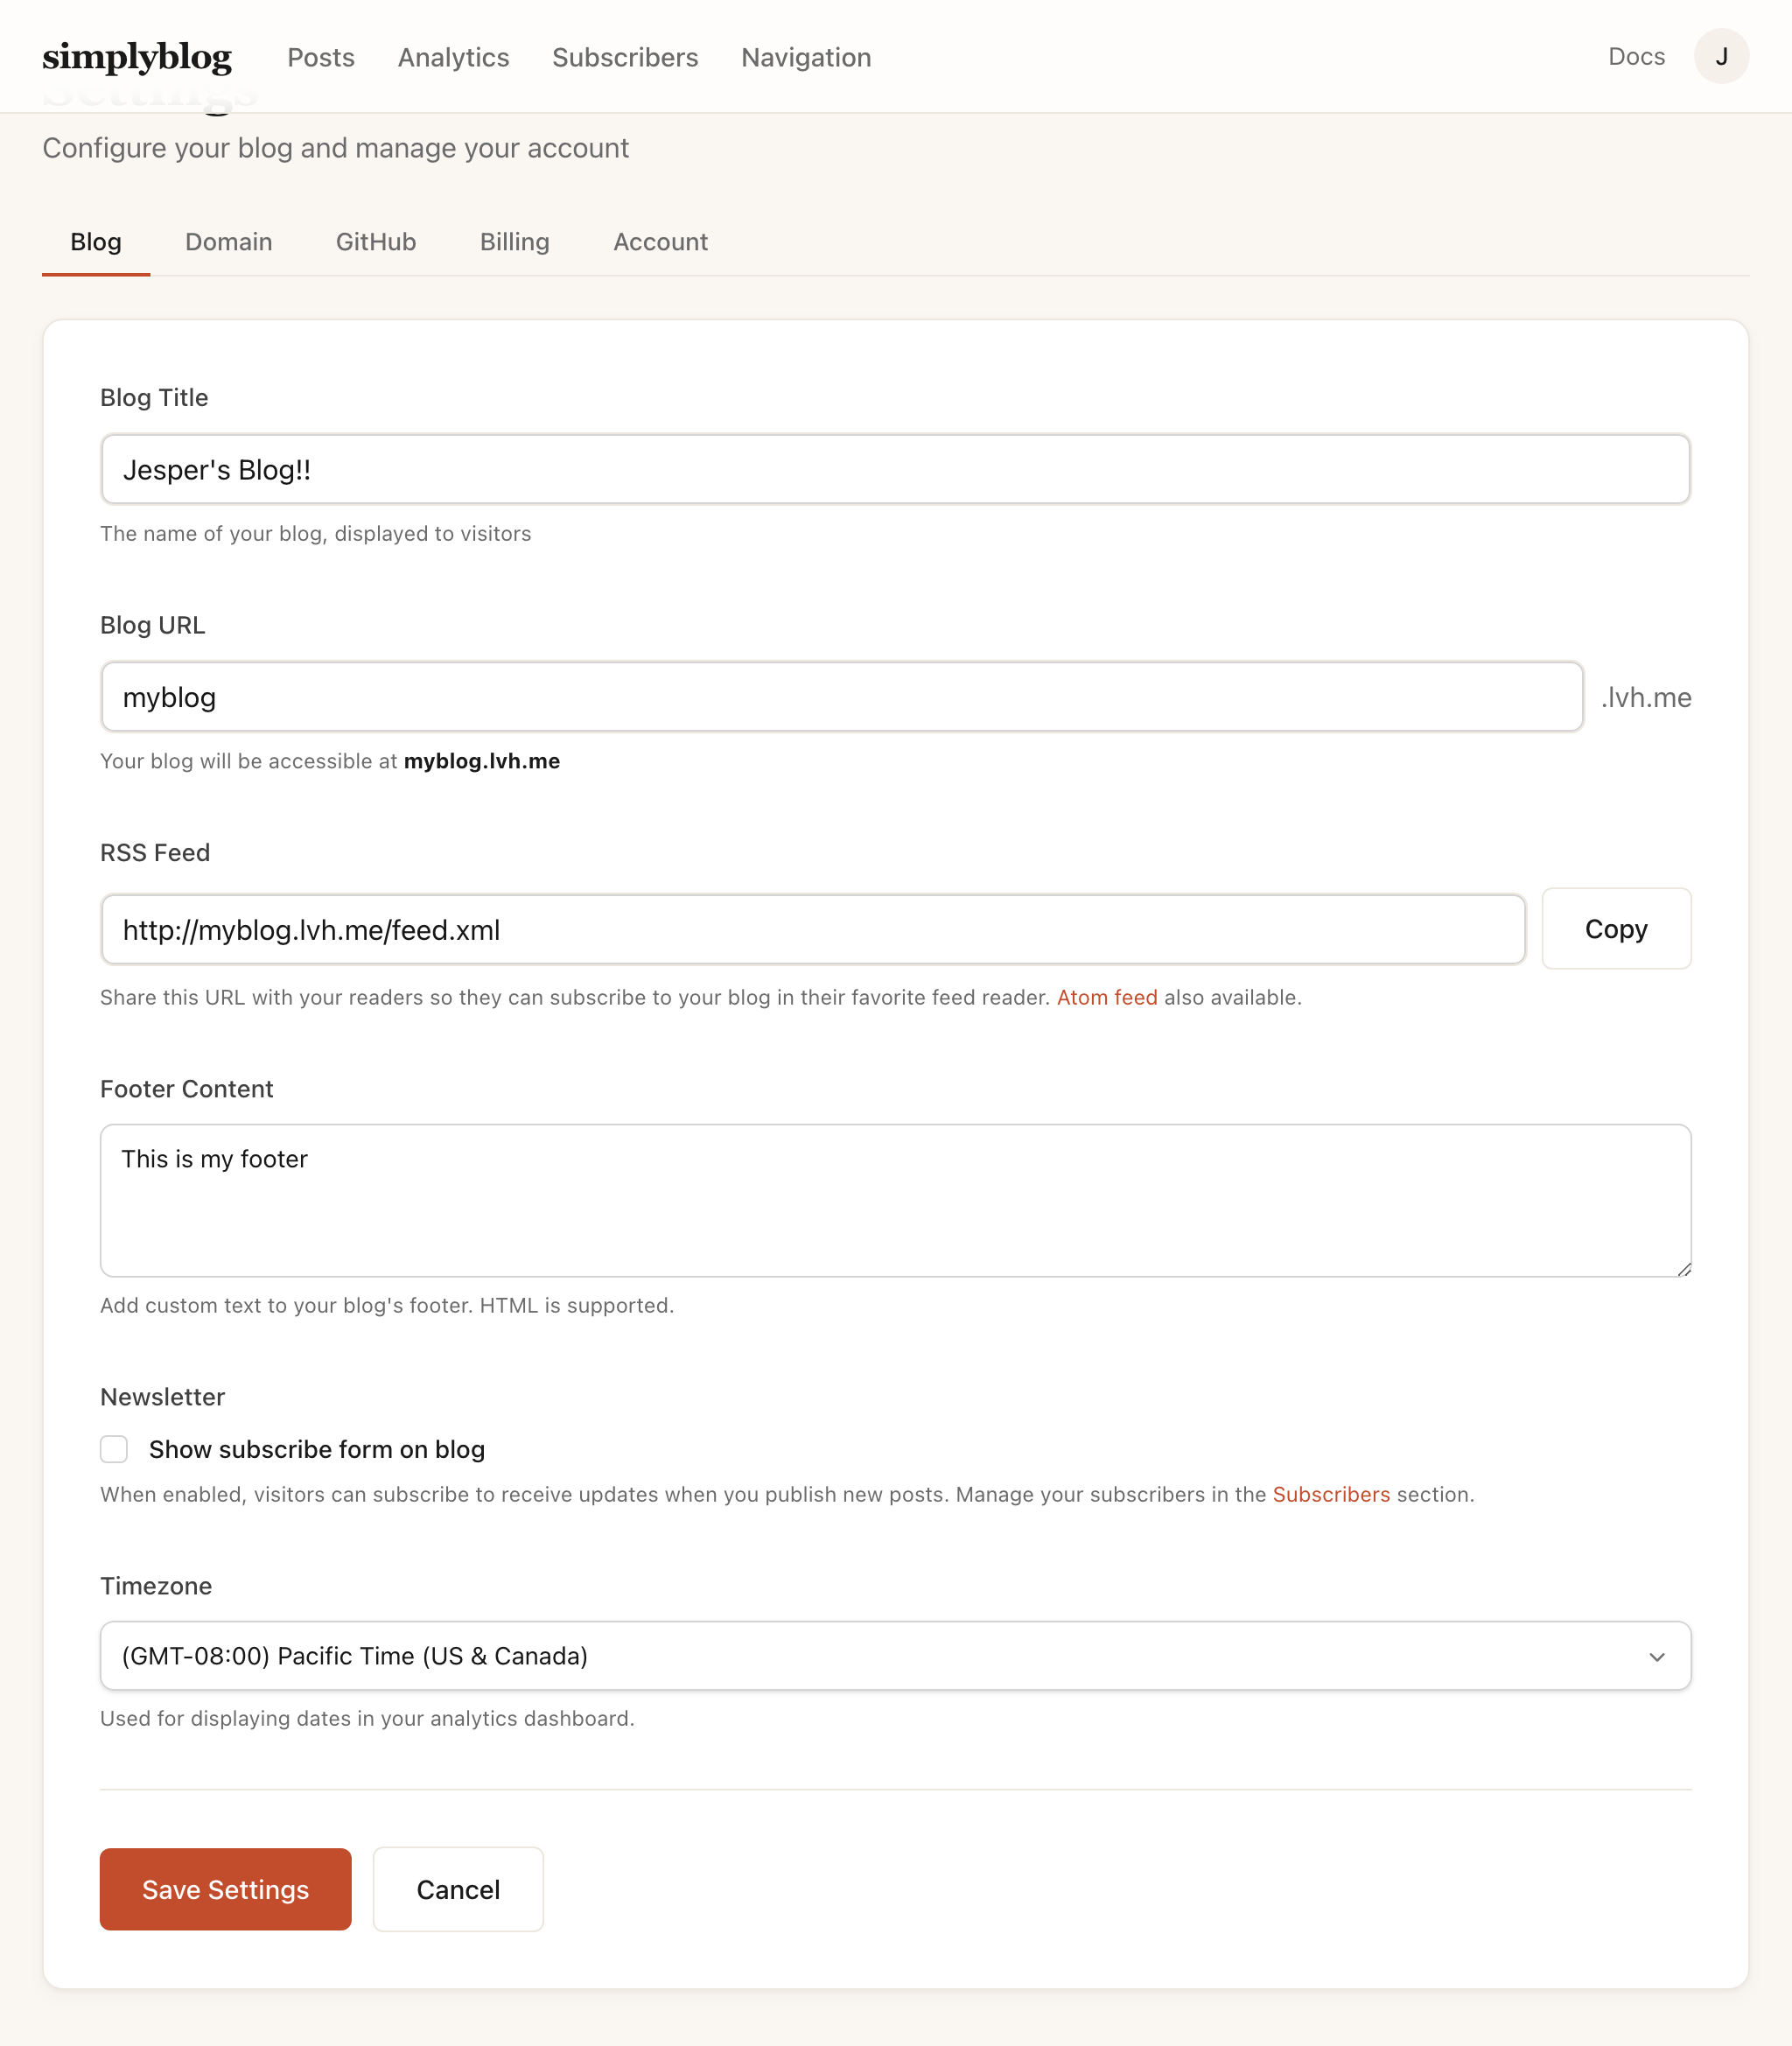
- Title — Your blog's name, displayed in the header.
- Subdomain — Your blog's URL (e.g., yourblog.simplyblog.io).
- Custom domain — Connect your own domain (Pro plan).
- Homepage — Set a page as your homepage instead of the default post list.
- Custom footer — Add custom HTML content to your blog's footer.
- Newsletter — Show or hide the subscribe form for visitors.